

(Note: Since I wrote this, Trader Joe’s came out with a new flavor of these: Pineapple Teriyaki Meatballs).
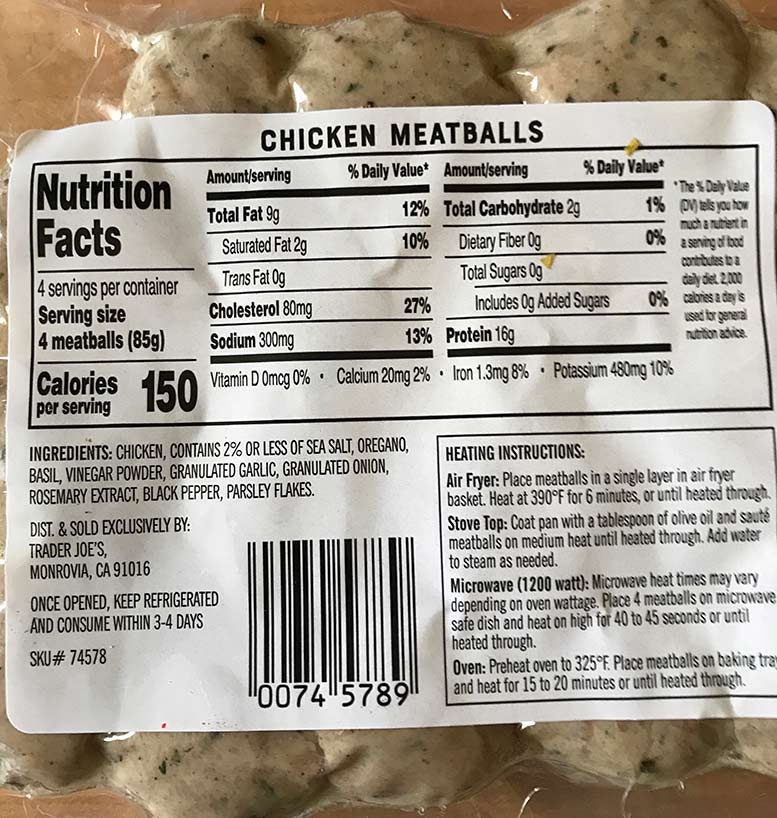
Trader Joe’s CHICKEN MEATBALLS “Seasoned, Fully Cooked, Gluten Free” (now there are 3 kinds!)
INGREDIENTS: All Natural Chicken, Sea Salt, Oregano, Basil, Vinegar Powder, Garlic powder, Onion powder, Rosemary, Black Pepper, Parsley
These meatballs looked interesting enough to me to try out and review. They’re sold fresh packed in a vacuum package. Fully cooked, just “heat and eat”.
‘Made from “all natural, minimally processed chicken, no antibiotics”. These are Gluten Free, simply made from chicken with a few simple seasonings. Vacuum packed, they can easily keep at least a week or more in the fridge unopened. For longer storage just freeze them (to defrost I just leave them in the fridge overnight).
I’ve found with these meatballs to be very convenient for a super fast easy protein to use to come up with an quick easy meal. I find them pretty tasty if just the tiniest bit rubbery (if I compared to my own homemade chicken meatballs). I think they would be even better if they had a little bit of binder (bread crumbs eggs, veggies or the like). If you’ve ever made meatballs you know they will come out softer with a little bit of some kind of “binder” in them. Meatballs generally have bread crumbs, eggs, and milk.
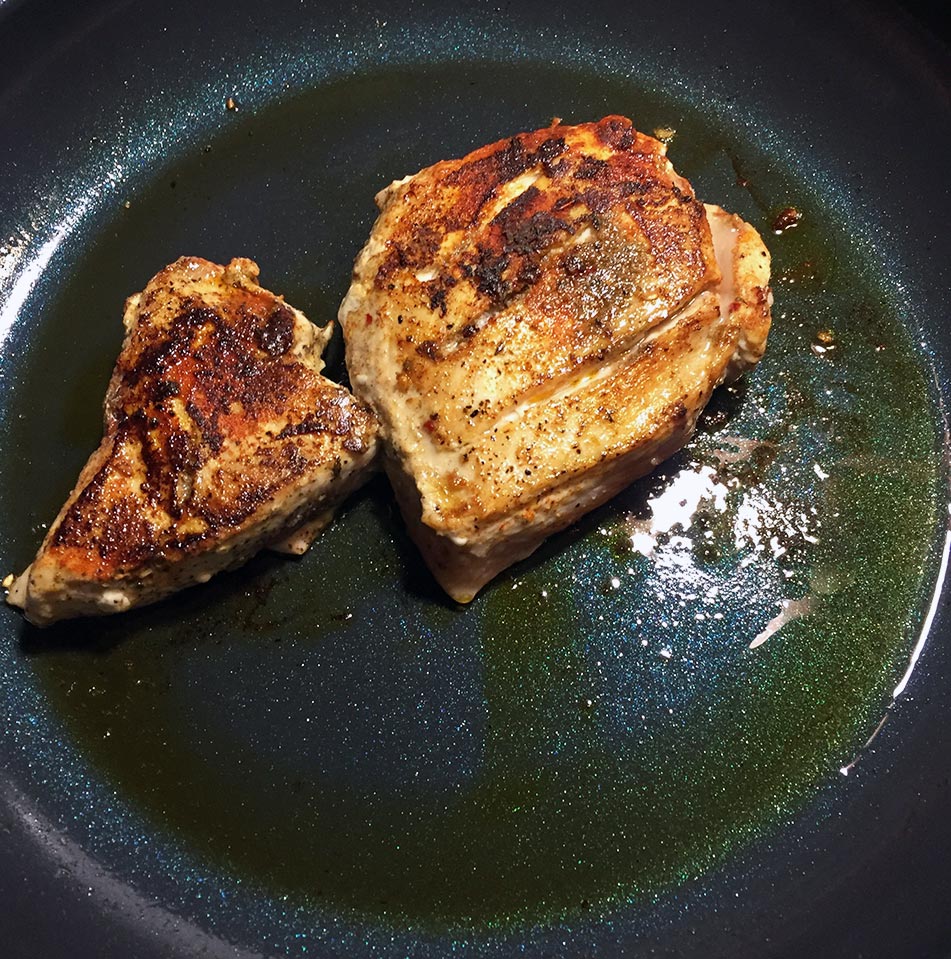
I suggest you be sure to brown them, as I think the flavor will be improved by browning. So I suggest don’t just nuke these, Brown them up in a nonstick or well seasoned pan in a little butter or oil.
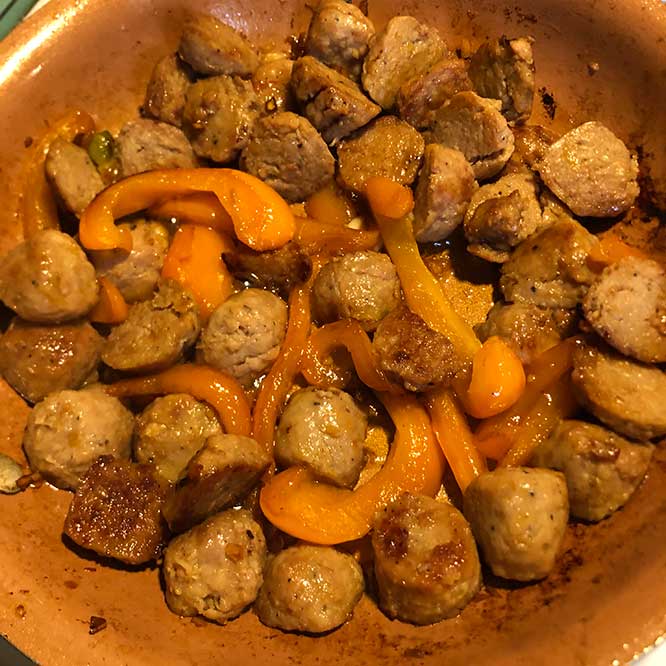
I cook them via the “Stove Top” method, browning with some butter and/or olive oil. I sometime cut them in half, or quartered or sliced up as that increases the surface area for browning. If you want them whole that’s fine too just turn them to get all sides brown before serving. When they are golden brown, turn off the heat, toss a tablespoon of water or stock, or lemon juice in and cover the pan immediately to let them steam a bit which will soften them. A sprinkle of lemon juice perked them up nicely. Before cooking them I like to sprinkle them with either Smoked Paprika or AJIKA blend which helps browning even more, plus adds nice flavors.
These will be good with some sauce of your choosing… Sriracha Mayo or Garlic Dip mixed with lemon juice… Or even just some ketchup and/or mayo….Magnifique Sauce. Your favorite BBQ sauce. Sweet Chili sauce… Basically any sauce you like will work and improve these.
Here is a one way I’ve served them. Cut into halves, browned up and put on top of a bed of lentils that I had made a few days before. Another way was in a Wrap on a flour tortilla.


These can easily become dinner along with some sides, say rice or potatoes, or pasta and a veggie. I think these might match well with any one of TJ’s simmer sauces (Thai or Indian). You could brown them, add sauce, simmer a few minutes and serve. Maybe toss in some frozen green beans or peas in the sauce as well? Serve on top of rice or noodles or pasta. Or just with pita or Naan? What about making these Italian style? Brown and add your favorite jar of tomato sauce. Toss them with pasta and you have an easy dinner. Or maybe brown them, slice up, and put them into a pita with some lettuce and some sauce? Or just serve them sliced up on top of a salad? So you might find these a handy thing to have in your fridge. TJ’s Chicken Meatballs are $3.99 (12 oz, about 16 meatballs in the package). Figure maybe 4 per person/portion? 4 meatballs have 16 gr of protein with 150 calories!
Now on the other hand with just a little effort you can make your own chicken meatballs! No really, it’s pretty easy. While these are very convenient of course, your own homemade ones will be way better.
RECIPE – HOMEMADE CHICKEN MEATBALLS: Take a package of Trader Joe’s fresh ground chicken ($3.99 $4.49 a pound). Put in a bowl. Mix in one egg, 2 tablespoons milk, 1/4 cup seasoned bread crumbs or Panko., 1/4 tsp Salt & Pepper (Optional add more seasonings, and even better with some chopped scallions, parsley, garlic, cilantro? Add a tablespoon of AJIJKA spice or Smoked Paprika. Mix ingredients thoroughly. Put in fridge for 1/2 hr to firm up. Form (using wet hands) into small meatballs. Flatten them in the pan into patties (more surface area to brown). Cook in a nonstick pan/cast iron with butter and/or olive oil. Sprinkle on Smoked Paprika. Cook about 4 minutes per side, till well browned. Deglaze pan with 2 tbl water, lemon juice, add butter and pour pan sauce over chicken.


Recent Comments