Trader Joe’s CHICKEN / PORK GYOZA DUMPLINGS


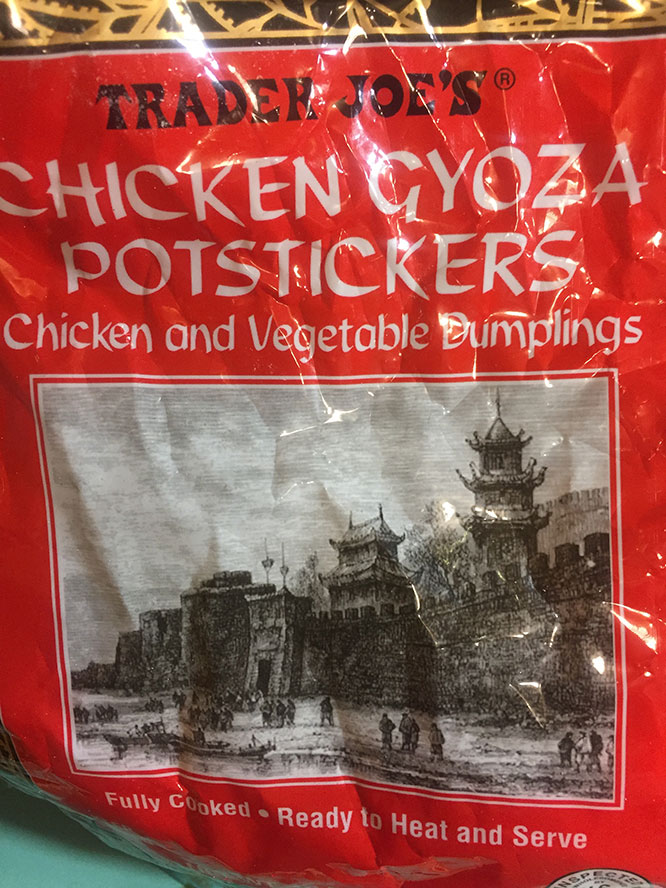
Chicken and Vegetable OR Pork and Veg. Gyoza Pot Sticker Dumplings – Perfect for now (currently Chinese Lunar New Year) or anytime of course.

Chinese dumplings are one of my very favorite things to eat. Seriously. Over my lifetime I would not be surprised if I’ve eaten a thousand of them, in one small hole in the wall place or another, mostly in Manhattan’s Chinatown or Flushing’s. Flushing especially has become a destination for dumplings with terrific places that specialize in dumplings of all kinds. I’ve even learned how to make dumplings myself, from scratch, including at times even making the wrappers! (I usually buy them in an Asian market). However that’s too much for most people. Which is where these babies come in. When you just get a craving for Pot Stickers, you can buy these frozen Gyoza Pot Stickers that TJ carries in their frozen Asian section. They’re good! They’re cheap. $3 bucks a bag. Wow.

Now I am not going to say that these dumplings can measure up against my favorites dumpling joints. Never the less the fact is I buy these bags of dumplings all the time to have on hand in the freezer for whenever I get a dumping craving and don’t want to leave the house (which let’s face it is all the time right now in the middle of Covid-19!)

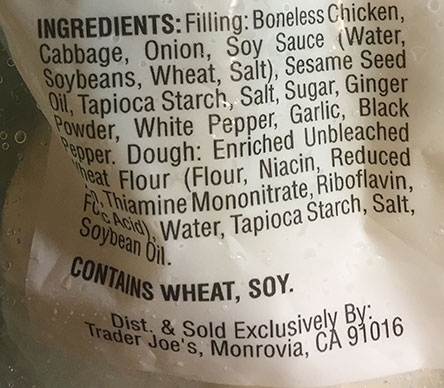
These TJ bagged dumpling are not at all bad for what they are, they are super convenient, and frankly at $3 a bag (about 21 dumplings) they are a steal. TJ sells both a Pork & Veg version and this Chicken & Veg version which I am reviewing here. As the pork one is not “porky” enough for me (I can make a decent pork and cabbage dumpling) personally I give a slight edge to the chicken ones surprisingly, as of course pork dumplings are way more typical dumplings. Buy a bag of both and see which you prefer. They’re both good. Now the stuffing of both versions are too finely ground up for my personal dumpling preferences. In any handmade dumpling you would usually be able to see chopped up vegetables which one can’t in either the pork or chicken dumplings.

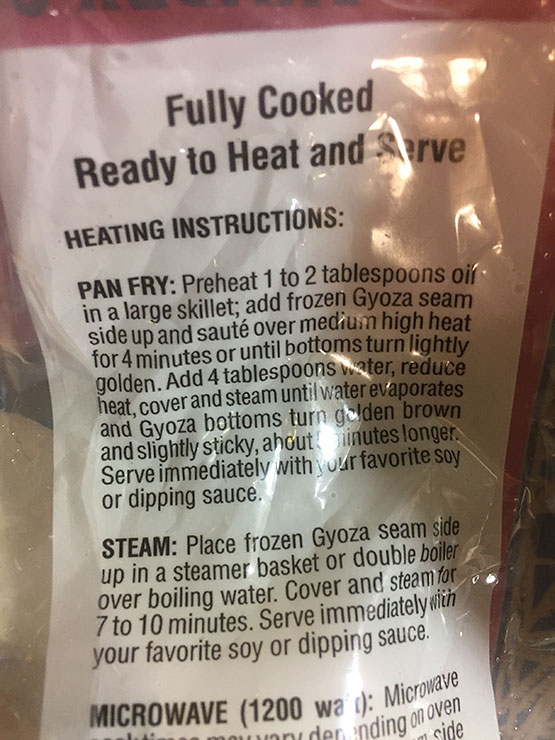
These are a tiny bit on the blandish side but a good dipping sauce can really make up for that with some nice Asian flavors in it. My first choice is to make these in a pan as Gyoza or Pot Stickers. Pot Stickers refers to first frying the bottoms, and then adding liquid to steam them, giving one the best of both worlds texture-wise in a single bite, with the wrapper both a bit crispy/chewy plus soft. The skins on these TJ dumplings are neither too thick nor too thin but acceptable in proportion to the filling. If I make them myself they would have thicker skins, be bigger and more packed with filling. But these do fine in a pinch. I have never tried cooking these in a microwave though the package states you can make them that way. Nor have I tried making boiled dumplings with these, as also suggested on the bag. If you did boil them in a strong flavorful chicken broth they might be very good that way, especially with some spinach, kale or other leafy vegetables, i.e., a “chicken soup with wontons and greens” type soup (hmm, i just gave myself an idea to try out!)

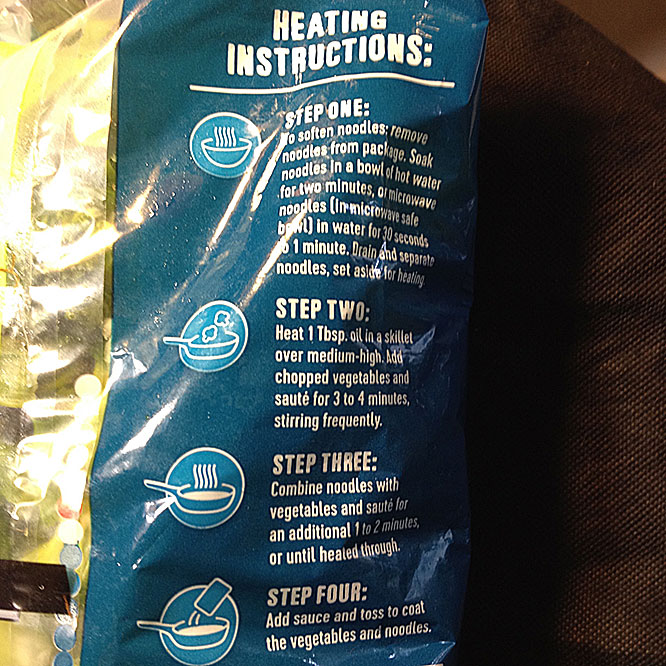
PAN FRYING YOUR DUMPLINGS: One can boil these but personally I make these mostly as Pot Stickers or Gyoza using a well-seasoned black cast iron pan. If you don’t have one of those just use a good non-stick pan. Swirl a tablespoon or 2 of neutral vegetable oil in the pan with medium heat. Put your frozen dumplings in bottoms down, careful they don’t touch each other or they will stick together. You will hear them start to sizzle in a bit. Let them cook without touching them till they are nice golden brown on the bottom, maybe 4-5 minutes…You can check one every once in a while. You don’t want to burn them however you do want very browned bottoms, Well I do! When they are browned, toss about 3-4 tablespoons of water (or stock) into the pan and immediately put a cover on! Stand back of course as they may spit or really steam up at you. Lower the heat a little. If you have a clear glass cover that’s ideal so you can see whats going on inside but if you don’t, any cover that fits tightly will be fine. We want to let them steam until the water is just about all gone which may take about 6-8 minutes. Check when you think they are done. When they are almost ready if you put a tiny bit more oil when the water is all gone and let them keep cooking they can get a quite crispy bottom which is lovely, but this step is tricky, and optional. Anyway this is the reason these dumpling are called “pot stickers” as they do tend to stick to the pan and not want to leave it! If they are a bit stuck use a thin spatula to gently help release them, being careful not to tear the skins.

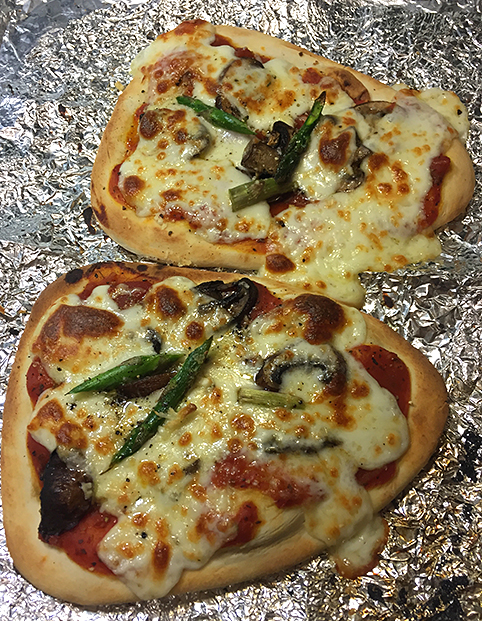
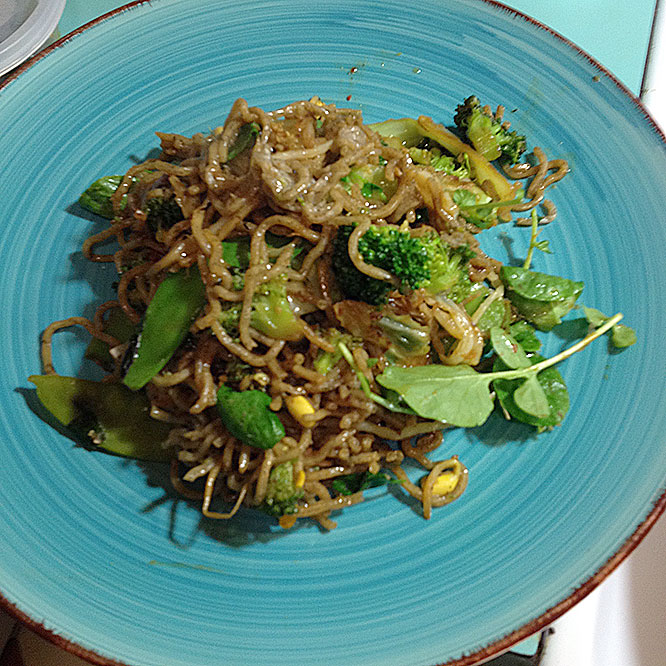
You should to eat your Gyoza right away while they are nice and hot, so timing is critical. What we do, is we get everything ready, then take just 2 or 3 dumplings at a time on our plates, cover the pan with the heat off to keep them warm and come back to fill up with a few more when we finished the first ones. That way you always eat warm dumplings. In the first picture you can see I served them with edamame and peas which were a great match with these dumplings to add in more veggies. You can serve them with a little rice too and any kind of veggie or salad. We can usually eat about 6 each easily as the Main, along with other stuff though they can be just an appetizer of say 3 or 4 each. I strongly suggest eating lots of green veggies with these. Edamame go great. If you can get Bok Choy or Choi Sum, that would certainly go well. And toss lots of chopped scallions all over these when you serve them.

Many countries have some variation of pot sticker dumplings. In Korea, “Mandoo“. In Japan they are called “Gyoza“. In China, Jiao-zi or Guo-tie.

锅贴 
Goutié

https://www.tasteatlas.com/guotie/recipe

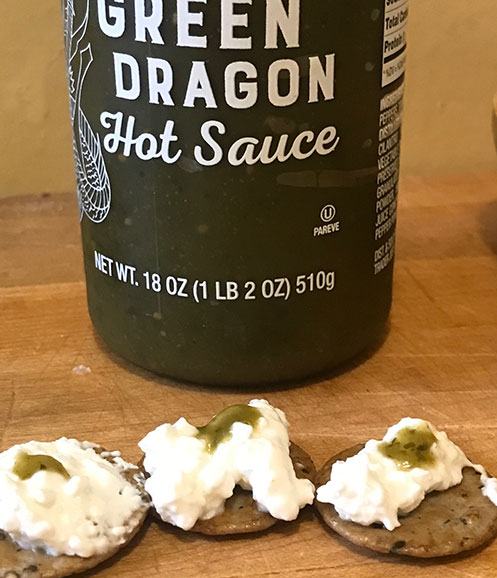
You always eat dumplings with a dipping sauce. One classic sauce might be Chinese Black Vinegar* with lots of julienned ginger. Or soy sauce plus vinegar, sugar, ginger and garlic. TJ sells a bottle of “GYOZA DIPPING SAUCE” which is fine if making your own sauce is too much trouble. I frequently use TJ’s diping sauce and add just add a few things to it (like Lao Gan Ma, chili sauce) If you like fresh cilantro it’s wonderful with dumplings. Something spicy to add a kick if spicy is your thing, like me. Green Dragon hot sauce for example is great with these! TJ’s Sweet Chili sauce is also lovely! I mean a bit mixed into your dipping sauce.

While I can’t say these TJ frozen dumplings compete with the best Chinese homemade dumpling places I have gone to, these are quite decent and make up a great deal with the convenience of being able to have them anytime you get a craving! These bagged ones are such a bargain for $2.99 a bag (UPDATE: now $3.49). TJ has a number of other “fancier” dumplings in the frozen section in boxes which cost a bit more but frankly I keep coming back to these cheaper bagged versions. I tried TJ’s Pork and Ginger Soup Dumplings and frankly was not impressed. Not surprising as making Xiao Long Bao is a pinnacle of the art of dumpling making. I’ve eaten them at some top dumpling restaurants like Nan Xiang Xiao Long Bao in Flushing, Queens (fantastic! go if you get a chance).

  • Chinkiang Black Vinegar can be found at most Chinese or Asian groceries (5-6 dollars?) If you can’t find it and don’t mind paying through the nose Amazon sells it. It’s a classic, pantry item.

SIDEBAR: In New York City if you want terrific pan fried or boiled dumplings I check out VANESSA’S DUMPLING HOUSE which I first enjoyed 20 years ago in her original tiny hole in the wall joint on Eldridge Street where no more than 4 people could fit. Her product was fantastic and word grew about her amazing dumplings which went back then for the amazing price of 5 for $1! Vanessa’s business grew and she became a very successful immigrant entrepreneur who kept expanding and improving and now has multiple beautiful places. If you eat her pot stickers or any of her many kinds of dumplings you will learn what really good dumplings taste like. They do cost more though now! Finally, if you really are interested in learning more and maybe trying your own hand to make dumplings you will find lots of great info here

https://carlsbadcravings.com/potstickers/

and if you are REALLY inspired, make these yourselves!

VEGETARIANS – TJ does have vegetable dumplings too ! (boxed, frozen)

BONELESS CHICKEN BREASTS – How To Cook Nice and Juicy! (RECIPE)


Lots of people complain about boneless chicken breasts being dry and tasteless.

Cooked correctly and they will not be dry. You can make them turn out juicy and delicious easily with this cooking trick I’ve come up with.

Boneless breasts can quickly go from being moist and juicy to dry very quickly, within just a minute of overcooking. You have to be very careful with your cook time and technique. Over the years I’ve experimented plenty, cooking boneless breasts until I figured out a method that really seems to work well.

Try this the next time you make boneless chicken breast. Here’s my my not-so-secret (shh, secret) way of cooking boneless breasts so they are juicy and delicious. Chefs typically do this.

Chicken breast meat, especially off the bone and with the skin removed, is naturally lean as white (breast) meat doesn’t have enough internal fat, like dark chicken meat (such as thighs. That is why chicken thighs are so much more forgiving and easier to cook without them getting overcooked and dried out.

The trick with cooking boneless breasts is basically to get a very nice sear on both sides, so they get flavor from browning (ie the Maillard reaction). Once browned on the outside, just turn off the heat. Let them finish cooking in the pan with the cover on and the heat off using residual heat .

That’s the secret in a nutshell. Details follow….

Here’s the general outline of my method: Season/Marinate. Sear on both sides. Turn off heat. COVER PAN. WAIT.

Chicken breasts – Fresh or Frozen.

During Covid-19, I started buying frozen breasts instead of fresh at Trader Joe’s. Sure I usually would prefer fresh over frozen but I as I (didnt) want to go to a store as often, having frozen chicken breasts in the freezer is very practical. TJ’s sells them prepped and quick frozen in 2.5 lb bags, either “whole breasts with rib section” which are a big whole breasts or you can get portioned, trimmed up ones which are half a breast and make a perfect portion per person. They run about 7 or 8 dollars a bag. And there is an Organic option which doesn’t cost much more than the regular ones so you might opt for those. If I get them frozen, I let them do an overnight defrost (more like a full day) in the fridge – how long will depend on how thick they are. As I have mentioned many times in this blog, I always use the slow defrost method, as it is the best method for defrosting almost everything. If you rush the defrosting and say leave it out on the counter you will see liquid run out of the meat. Then your chicken will be drier no matter how you cook them.

Fresh: Naturally if you prefer to use fresh boneless chicken breasts, this same cooking method works equally well with fresh breasts. Fresh of course is the “normal” way I would buy chicken pre-Covid-19 and have also at times bought fresh breasts when they were on sale, prep and and freeze them myself. It’s just a little more work, but if they are ever $1.99 /lb on sale at my supermarket, its worth it.

HOW TO COOK JUICY BONELESS CHICKEN BREASTS :

Prep and trim the breasts. Season and/or marinate the meat (use a spice rub or marinade). In the picture above I used some TJ TACO SEASONING all over the breasts. Its a tasty and convenient spice blend I think actually works well with chicken as well as beef. Its a cumin and chile “mexican” spice blend. AJIKA works great too. Of course any mix or blend of spices of your choosing will work. Smoked Spanish Paprika is great to add as it helps browning and is very flavorful (TJ carries it in a tin). I almost always add fresh garlic. Rub spices all over. Salt/pepper to taste. Let the seasoned chicken marinate/sit for 20-30 minutes on the counter. TIP: Rub some Olive Oil (EVOO) over the chicken before adding the spices and they will stick better. Some people like a sprinkle of some coating (a bit of flour, or breadcrumbs or Panko). What we are going for is a nice golden brown color on both sides of the chicken.

Put a tablespoon of olive oil (or oil and butter mix) in your pan (Non-stick or Cast Iron). Cast iron is terrific. Get your pan hot on medium heat. Add chicken breasts and let them sear: They should sizzle as soon as they touch the pan.

NOW – DO NOT TOUCH or move the breasts in the pan for 3-5 minutes — wait until you see a good “Golden Brown and Delicious” sear on the bottom. Good browning is crucial for flavor (aka the Maillard effect). When bottom side is done, use a spatula to release the chicken. Flip the breasts over and cook the other side – but only about 2-3 minutes on side two (!)

Now turn off the fire and immediately put a tight fitting lid on your pan. Do not peek or open the cover for 7-10 minutes (we don’t want to let the precious steam that will finish cooking them) TIP: (optional) Squeeze a quarter lemon in the pan before closing the lid, quickly. Throw the peel in too. Set your timer for 7-10 minutes to let the breasts finish cooking in the covered pan. Thats the whole trick, letting residual steam and heat finish them, slowly. Voila! Juicy Breasts with a ton of flavor.

This little trick to cook juicy boneless breasts is that easy. With this method, the seared breasts are not cooked all the way through the middle but will finish cooking in the “closed, moist environment” inside the pan. Now you may have to play around with your own actual timing, adjusting a little bit either more or less based on thickness of chicken and what type of pan (thicker pans and cast iron hold heat well). What we are aiming for in the cooking is getting them just over the line of seeing any pink or rawness. After they are just past the point of not being pink you get them out of the pan and rest them on a plate or cutting board for about 4-5 minutes (some foil over them will help keep them warm). Resting keeps juices in. The breasts should be cooked through (don’t slice before resting them, but once rested you can “peek” in a thick section). Remember meats continue cooking a bit from residual heat inside.

In the photo the bigger thicker piece did need another 30-60 seconds to finish cooking completely so I just put it back with the cover on with a lowish flame for one minute. Its way easier if they are a bit underdone to cook them a little bit more then overcook them. You can also make shallow slashes in the thicker part of a breast prior to seasoning them to help even things out with the thinner parts as heat will penetrate the slashed part easier. Or you can pound the thick part flat with a pan a bit which will even them out. Anyway give this method a few tries and you will figure out your exact timings depending on a few factors (chicken thickness, heat source, pan thickness, etc). Electric stoves of course have a great deal of residual heat after they are shut off so Wait Time would really need to be much less (or just move the pan to a cool burner). If your chicken is still coming out “dry” with this Sear & Cover Method, you will need to deduct a minute of the outside browning time especially after you turn them. Conversely if its pink in the thickest part add a tiny bit more time. You can also try it with the lid on for the second side browning, but deduct a minute or two as the steaming effect inside the pan will be more intense. Now that you know this sear and cover method, you can experiment. If you like the results please let us know in the COMMENTS section.

Naturally serving these with a tasty sauce is great for flavor plus keeping things moist too. Try yogurt and Green Dragon or Zhoug -or- yogurt and lemon, or just deglaze the pan with a tiny bit of stock, wine or even just water and using the scrapings, and a bit of butter to make a few tablespoons of pan sauce. If you want a slightly thick sauce, add a pinch of cornstarch slurry.

Hope you enjoy this basic technique. If you want to explore cooking boneless breasts by poaching them instead of grilling, the Kitchn has a detailed explanation and good cooking technique for POACHED BONELESS CHICKEN BREASTS (LINK BELOW) Poaching is great for moistness, but you don’t get the intense flavor of grilling.

https://www.thekitchn.com/how-to-cook-moist-tender-chicken-breasts-every-time-cooking-lessons-from-the-kitchn-36891

Trader Joe’s frozen Wild Raw ARGENTINIAN RED SHRIMP, reviewed


RAVE

“Trader Joe’s Argentinian Red Shrimp are caught off the southern coast of Argentina. They have a sweet lobster like flavor and texture. Grill, barbecue or sauté. Serve with pasta, on salads or as an entrée…” (Wild, Raw, Peeled, Cleaned and Deveined Frozen Shrimp)

WILD CAUGHT, PRODUCT OF ARGENTINA

Ingredients: shrimp, salt

FYI – Shrimp is the most popular seafood in the United States, but in reality only a tiny fraction comes from domestic U.S. sources. Ninety percent of the shrimp we eat is Imported, and almost all of that comes from shrimp farms in Southeast Asia and Central America.

If you’re looking to buy shrimp at Trader Joe’s I would check out their wonderful Wild Argentinian Red Shrimp. These are the best shrimp Trader Joe’s sells. In fact these are some of the best shrimp out there, period. These Patagonian Red Shrimp are from Argentina. First off, these are Wild Caught, not farmed, shrimps. Wild shrimp are said to have better flavor than farmed, plus be better for the environment.They’re large, meaty and actually do have a sweet lobster-like texture and taste. Some people think of these shrimp as “poor man’s lobster”.

Patagonian Red Shrimp, are fished from the icy waters off Argentina’s coast in Patagonia. They are individually flash frozen, cleaned (and deveined) and ready to use. They’re a quite decent size (20/25 count aka “Large”).

Are these truly “the sweetest shrimp in the world”? … well even if some marketer came up with that, they actually do taste kind of sweet and have what many people think of as a “lobster-y” texture as well as taste.

(If you are interested in learning more at these here’s detailed info about “Patagonian Red Shrimp”)

How To Use These Shrimp: You use these red shrimp the same as any other. Be careful NOT to overcook them of course. If I’m not using the whole bag I just take out as many shrimp as I need , and close the package up super tight with a twisty, and double bag the package inside a Ziplock freezer bag (double bagging these will help keep out freezer burn).

So first things first, what are the best defrosting method(s) for these frozen shrimp?

DEFROSTING : The best method to defrost them is the traditional overnight thaw in the fridge in a covered glass bowl. Thats the best way. Still if you didn’t plan ahead to do that, the next best option is to put them in a plastic baggie, and run a light stream of cold running water over the bag (you can weigh down bag with a cup or plate). The shrimp should be defrosted in about 15 minutes or so. This last method works OK too in a pinch: I’ve simply put the frozen shrimp in a bowl, covered them with an inch of cold water, and stirred them every 5 minutes or so. Defrosting this way should take maybe 15-20 mins. Cooking from frozen: No way, I would not recommend doing that. They will shrink up a lot and be tough. Microwave also a no-no, you will ruin the texture of the shrimp.

Cooking: Cook these red shrimp the same way as any shrimp. However these do seem to cook a wee bit faster so be careful not to overcook them. If you are say using a sauce, you can simmer the (defrosted) shrimp slowly in the sauce at the very end, cooking them in the sauce for maybe 2 minutes or so (turning them over once). As soon as they are no longer translucent and look firm these are cooked, and/or at least should be removed and then added back to your dish at the end. Not over cooking will keep them plumper and juicier. When you overcook shrimp they become chewier and shrink up.

TIP: If grilling them, you can marinate them for 15 min in lots of TJ’s CUBAN SPICE BLEND. Or any spices of your choosing. Ajika blend also is terrific as is TJ’s spicy Peri-Peri Sauce. Another great spice for these? TJ”s new blend HOT & SMOKY PAPRIKA

These shrimp are terrific simply sautéed in olive oil with lots of garlic, scampi style. You can blot them with a paper towel, optionally sprinkle them with a little seasoned flour and sauté them in oil and butter. One trick I saw on MilkStreet recently was to pan fry shrimp on one side only, then take them out of the pan and later finish them in your dish for 30 seconds at the end. This is a great idea, as you won’t overcook them.

These shrimp are of course great grilled / sautéed and excellent in a pasta dish. You can put them on a skewer and broil or grill them (brush with oil). They are equally great gently poached, about 3 minutes, which is a good way to make them for cold cooked shrimp or for the top of a salad.

If you try these shrimp you will probably like them as much as we do. I find them super convenient to have in the freezer. TJ’s sells the Wild Argentinian Red Shrimp (1 lb. bag) for $9.99

*UPDATE-1 (Feb 2021) price increase to $10.99. UPDATE-2 (Apr 2022) price up again, now 11.99

On this site not only do these get top ratings, they are called the “lobster impersonator”

More cooking ideas follow.

Dishes: I made a nice Thai Shrimp Curry with the shrimp, veggies and TJ’s Thai Red Curry sauce – adding the shrimp the last 2 minutes (a no-recipe recipe follows below).

THAI STYLE SHRIMP CURRYSauté some onions, garlic, and chopped ginger in oil for 4-5 minutes. Throw in chopped up carrots, celery, potatoes (optional add ins: mushrooms, peas, sweet potatoes, scallions) …sauté everything for 5 more minutes, then add 1/4-1/2 cup liquid (water or broth (Option: Add a 1/2 cup Coconut Milk for the liquid)) Simmer for 10 minutes, then add in a jar of TJ Thai Red Curry sauce and simmer another 10 minutes or until all the veggies are just tender. The last 2 minutes of cooking, you add your shrimp and simmer gently in the sauce, stirring occasionally. Serve the curry with jasmine rice and add chopped scallions on top.

Shrimp Roll on Brioche Bun (aka The Poor Man’s Lobster Roll)

Here’s one more: As these shrimp are kind of “lobster-y” they are perfect to make a New England style Shrimp Roll (aka the Poor Man’s Lobster Roll). Gently poach the shrimp 90 seconds or so just until opaque and pink (don’t over cook them). Rinse them under cold water. Split or cut them up and mix with a little mayo and lemon juice, then put them in a lightly toasted buttered Brioche bread or Brioche Bun (spread with a little mayo). If you have some, sprinkle a little Old Bay seasoning or dill seasoning on top. Easy and delicious.

RECIPE: RED SHRIMP WITH HONEY ALEPPO SAUCE – https://www.traderjoes.com/home/recipes/honey-aleppo-shrimp

(NB: TJ’s recipe here says cook the shrimp for 5-10 mins; I suggest thats too long unless you want overcooked shrimp. I say cook these shrimp about 2-3 minutes)

Ramen? Yes. I used the shrimp in (“Roy Choi style”) instant ramen with a slice of cheese and butter.. (crazy but it works, see video below). For this dish which was a dinner, I made a veggie stock instead of using the included packet of seasoning* and added some fresh mushrooms. I added the defrosted shrimp at the very end of cooking, and only cooked them about a minute or two. See they look juicy (not overcooked)? TIP: That little flavor packet included with instant ramen is just loaded with Sodium (like 50-70% of daily recommended level)? Bad for you, so better to use your own stock or a low sodium stock and maybe just add a pinch of the flavor packet. Worst case, use only half the packet and if it tastes too flat, add something to flavor it up without adding much sodium (a dash of low sodium soy sauce or a few drops of Nam Pla (fish sauce).

ROY CHOI’S INSTANT RAMEN WITH CHEESE

Another idea? Vietnamese style rice paper shrimp rolls (search Asian markets for the rice wrappers) https://justasdelish.com/vietnamese-shrimp-rolls-peanut-hoisin-sauce/

One more idea? Fried rice with shrimp.

CABOT EXTRA SHARP CHEDDAR CHEESE Reviewed, A Cheese Lover’s Delight


RAVE

My review for TJ’s Unexpected Cheddar seems to have gotten quite some interest, so next up for review in the Trader Joe’s Cheese Department is an absolute classic cheddar which I mentioned in that post. For my money the well known, long established, classic cheddar Cabot Extra Sharp from Vermont is the definition of and gold Standard for an “East Coast” Sharp Cheddar cheese.

Its terrifically convenient that Trader Joe’s carries it under Cabot’s own famous brand name. Cabot is actually a Vermont cooperative farm. Cabot extra sharp cheddar is my personal go-to cheese as far as always wanting to have in the fridge. Its an Extra sharp cheddar, so it has that sharp cheddar tangy taste. “Intense, rich cheddar flavor with an East Coast bite” is how they describe it on the package. I would say that description is spot on.

Cabot cheese is made up in Vermont, and Cabot Creamery is bit unique as its a true Farmer’s Collective or co-operative. Its a group of farmers banding together as a collective. Cabot Creamer dates back to 1919 so it’s been around for about 100 years. This Extra Sharp Cheddar has won many many “best cheddar” awards.

This cheddar is great just eaten sliced however it’s also excellent to cook with. It melts wonderfully well. I think makes one of the most fantastic melted cheese sandwiches you will ever try. Also terrific of course in an omelet. Do I need to say, this cheese melted on top of a burger is good (I grate it first for that and cover it briefly or put under the broiler.

Eaten as is sliced and paired with fruit well that is a perfect, heavenly combination. Especially for me, paired with apples, grapes or a pear. Just put a hunk of of this cheddar in front of me with a good apple (like TJ’s Envy) and I am one happy camper. Ending a dinner with this cheese is divine.

Trader Joe’s sells Cabot cheddar for an excellent price ($6/lb) in a block. If you have never tried this cheese, give it a try. I think you will love it – though the kids may want something a bit tamer and less sharp. If so, give them the New Zealand cheddar, also excellent, or TJ’s sliced cheddar. The adults can enjoy the Cabot Extra Sharp.


Easy Pizza with Tandoori Naan


When I saw these frozen TANDOORI NAAN, I had an idea… Could I use these naan for the “base” of a pizza? If so than I could make pizza in mere seconds! OK it actually took me more like 5 minutes to assemble these pizzas (see pic) and pop them in a hot oven. But the idea? It basically worked fine. Using these Naan breads makes it super fast and easy to whip up some individual sized pizzas almost instantly. Just spread some of your favorite sauce, put on some cheese, and pop them in the oven, and Bingo you got a fresh hot pizza in about  10-15 minutes with almost no work at all.

As you can see in the pictures, I simply put some marinara on. I put slices of TJ whole milk mozzarella on, then threw it in the oven on a baking sheet for about 10-12 minutes at 400 .

Yes, I spruced these up a little adding a few sliced mushrooms and a few sliced asparagus to make it a bit “veggie”. I had this stuff in the fridge. Now I turned on the broiler for the last minute or two to really get the top nice and browned (I over did this by a few seconds so be careful if you do the broiler browning part). When they came out, I put some fresh grated parmesan on for good measure, and a drizzle of EVOO.

DELICIOUS!

naanpizza3

The Naan Pizza turned out quite good as you can probably tell from the pic. We ate one each with a salad for dinner and that made a very satisfying (and tasty!) dinner for us. Making these with the Naan requires so little time and effort. Yes the naan is not a real pizza base, it is more bread-y than a real pizza but seriously this was so fast, easy and cheap that making PIZZA NAAN is certainly worth giving a try sometime. TIP: Buy and try this with the GARLIC NAAN version TJ has as well. Obviously the Trader Joe’s Naan are great used in the traditional way too. For example accompanying some of the TJ Masala Chickpeas (frozen section) which are delicious!

A pack of 4 Naan is $1.99 (50 cents each, not bad huh). These are great to have in your freezer for pizza or Indian food or to use in many imaginative ways whenever you are in the mood.

Trader Joe’s GREEN DRAGON HOT SAUCE


RAVE

Trader Joe’s as you know carries a whole bunch of condiments and sauces, many being outstanding. It has quite a few hot sauces, most of which are VERY good. TJ’s Green Dragon Hot Sauce is one of my favorite Trader Joe’s items, along with Bomba and Peri-Peri and of course ZHOUG).

Now I would easily say Trader Joe’s GREEN DRAGON is a fantastic hot sauce and if you Google it, you’ll find it has many, many fans. GREEN DRAGON has far more fans than the TJ’s Sriracha (which while not bad is nowhere the equal of the original classic Huy Fong Sriracha {red rooster label) IMHO.

Trader Joe’s Green Dragon Hot Sauce‘s ingredients include: jalapeño, tomatillo, garlic, cilantro, vinegar, garlic, lime juice and habanero. It is spicy of course but not blow the roof of your mouth off spicy. This stuff has a lot of lovely flavors going on, it’s not simply “hot”With the above ingredients naturally Green Dragon can be viewed as a type of classic Mexican/South American style salsa. But it works with all kinds of cuisines and foods in particular I find Asian or Asian style food. When I’m making many Chinese or other Asian dishes I tend to use Green Dragon a good deal. Its very floral as it is made from fresh green chiles, herbs and aromatics. Used judiciously this sauce adds flavor to all kinds of dishes with a hint of spiciness. A few drops can go a long way in the flavor department, so you can use it a bit sparingly (unless you love heat, in which case use more of course!) For example a splash of this when you are making eggs, either in scrambled eggs, or on top of fried eggs… It’s great with egg dishes. I even put a few drops on something “boring” like cottage cheese (no really, try this combo on a toasted bagel – or on crackers which I have above) Cottage cheese with some GDS is boring no more. Toast up a bagel, top with cottage cheese, dot with Green Dragon; Thats one yummy breakfast. AVOCADO TOAST? YES! See below for a mini-recipe.

I just put some GDS in a lentil soup I had made and found it was perfect for that too, it added just that little bit of something extra that the soup needed. It is easy and fun to experiment with Green Dragon. Once you start trying it on different things, you will also discover, “umm, that works with this too”. Green Dragon sauce is one of my “always got to have in the fridge” TJ items! I never am without it and I keeps one in the pantry too, as I never want to come up empty. It’s a steal for $3.29 a bottle (18 ounces). In another Gourmet type store, something like this would be six bucks no doubt.

Avocado Toast: mash a ripe avocado up with salt, pepper, a splash of apple cider vinegar or lemon juice then add Green Dragon to taste. Spread the avocado mixture on lightly buttered sourdough toast, a sliced brioche, a bagel, or any of your favorite toast. This is really yummy. Side note – add some into your guacamole, of course that’s also a fantastic match).

PACIFIC ORGANIC ALMOND MILK


I’ve tried a number of the “milk alternative” beverages at Trader Joe’s. Most of them are pretty good. The one I keep going back to is PACIFIC FOODS ORGANIC ALMOND MILK (“Original”). I think the reason is I find its taste is a tiny bit better due to the fact the almonds its made from are roasted.

The Pacific Foods website says: “We take organic almonds and add a gentle roast to emphasize the robust, authentic flavors of the almonds. The result is our smooth, signature taste that’s a pleasure to drink by the glass and blends perfectly in your dairy-free recipes.”

We all know roasting nuts brings out their flavor, right? This subtle but noticeable taste in this almond beverage makes a small but slightly significant better taste giving this almond beverage a little depth of flavor over the other almond milks TJ carries.

I mostly use Almond Milk in the morning on my cereal. But this is also good to drink on its own (well chilled), mixed with yogurt, which is usually the things I put on my breakfast cereal with some fruit. I use this almond milk to make Smoothies; and its great for those. I actually do drink regular (cow) milk too though. I use regular whole milk in my daily cappuccino. Almond or Soy milk adds a taste that I don’t like in coffee drinks, for my taste or a cup of English tea.

The Pacific Almond Beverage costs a bit than the other nut milk beverages. This sells for $2.19 (1 Qt) compared to for example TJ’s Almond Milk ($1.89). Still this is worth trying and comparing to see what you like best. This version (original) does have a little organic cane sugar in it, but its hardly “sweet” and I think that also makes it tastier. Cow’s milk has naturally produced sugars too you know, just check the label.

The dairy milk industry by the way has been going crazy for the last few years about the word “milk” being used for anything other than the liquid produced by lactating cows. Hence the wording: “plant-based beverage” on the this box! The FDA thinks people get confused seeing the word milk used for anything other than cow milk. I do feel bad for dairy farmer’s, who have seen milk consumption decline way down from say, when I was a kid.


NO RECIPE RECIPE: BREAKFAST SOAKED OATS aka OVERNIGHT OATS (No Cooking)

OVER NIGHT OATS ARE A YUMMY AND HEALTHY BREAKFAST!

The night before, put up some rolled oats (or quick oats) in a bowl or container. Pour an equal amount of almond milk over them to cover by a bit and stir to mix. A spoonful of chia seeds are nice too! Let this oatey mix sit and soften up overnight in the fridge. The raw oats will soften up without cooking and become yummy. If you use Quick Oats this can be ready to eat in 15 minutes or so. Dried fruits thrown in will soften and be lovely too (dried cranberries, dates, raisins….) In the morning the mixture will be ready to eat. Top your overnight oaks with your favorite fruits (bananas, berries…) yogurt or kefir and maybe more almond milk if too thick. Some crunchy topping? Granola or a cereal. Nuts. Sweeten with honey or some raw sugar if desired. 

OVERNIGHT OATS WITH NICE PHOTOS

Trader Joes’s (frozen) AHI TUNA


ahi3
ahi1

“The secret to cooking Ahi Tuna is not to overcook it”

What is Ahi Tuna? “Ahi” is Hawaiian for YELLOWFIN TUNA

“Yellowfin tuna, scientifically known as Thunnus albacares, is a popular species of tuna found in tropical and subtropical waters worldwide. They are often marketed as “ahi” in Hawaii and elsewhere.”

Trader Joe’s sells AHI TUNA STEAKS, in the section with their other frozen fish.

My package was labled “Wild Caught, Product of Spain” (fished from Spanish waters in the Atlantic)

Ahi Tuna is one of my favorite fishes that TJ’s carries. and I highly recommend trying it if you never have before. It’s so good, meaty and satisfying.

If you have any leftovers, its delicious served cold the next day, maybe over a bed of rice or a salad.

How To Cook Ahi Tuna: First off, defrosting the fish. The best way will be a slow “overnight” defrost in the fridge. While the slow defrost will give the best result, if you didnt plan ahead, you could you can try putting the package of fish in a bowl in the sink, then running a slow stream of cold water over it. Leave it like that. That will take perhaps an hour to defrost that way.

TIP: Do Not Nuke the fish to defrost it; it will ruin the texture of the fish, making in mushy.

The package states you should “remove from package before defrosting”. I’m not quite sure why… anyone have a clue? Anyway I defrost it in the fridge overnight in the package and it seems fine.

MARINADE: Once the fish is defrosted I marinate it for a half hour to an hour before cooking. As far as marinades go, I generally make a typical Asian/Japanese style marinade: Soy sauce, fresh grated ginger, fresh ground black pepper, a pinch of honey or brown sugar, plus some oil, either olive oil or better still a teaspoon of TJ’s dark roasted sesame oil. You can add some type of acid if you like: a tiny amount of cider vinegar, lemon juice, or sake if you have it. You should serve it with some fresh Lemon or Lime.

Cooking Ahi Tuna: The first rule of AHI tuna is don’t overcook it. Its very easily overcooked. It is crucial that you don’t overcook ahi tuna as it can dry out easily. So be careful with your cooking time. Personally I think AHI is best cooked in the Japanese “Tataki-style” way which is just searing the outside on all sides and leaving the center a bit pink (See pic above). 

I generally cook it in a black cast iron pan over med-high heat with a little oil, and/or butter, searing the outside for 60-90 seconds on one side then turning with tongs to cook the other sides for a minute. You can use the tongs on the sides but again be careful not to overcook your fish. After you do it once or twice you will get the hang of cooking this way.

When done, take the fish out of the pan, and let it rest on a plate for a few minutes before you slice it. Which you will do against the grain like a steak. Be sure to save the pan juices and any juice that runs out on the cutting board to pour over your fish.

You can deglaze the pan with sake, rice vinegar, or even a splash of water, or some extra marinade that you saved at the beginning. I found that if you marinated the fish and use that marinade to deglaze the pan there is protein that coagulates when you cook it, so it glops up a little (I just thin it with soy and some water, it doesn’t bother me too much,  it makes it thicker thats all). If that gloppy stuff bothers you, don’t use the marinade, make a fresh sauce to serve with the fish. Here’s some ideas for sauces….

“Butter Shoyu” (Soy Butter Sauce) Put a fat dollop of butter in the pan along with a little soy sauce, a terrific combination. Mix it well and and pour over the Ahi. Serve with slices of fresh lemon or lime.

PONZU: Another classic Japanese sauce. Combine Soy sauce and fresh Lemon Juice. Do not cook this, just mix together. A bit of grated lemon rind would be a gourmet touch.

As in the photo of my finished Ahi, it should end up seared on the outside and pink in the center, just how pink is up to you. I like mine like it is in the thickest part, the center (just this side of raw) while my wife likes it as it is cooked on the ends (medium) which I think of as overcooked. As a final touch, I sprinkled some sesame seeds on top, sliced it against the grain, and put it on a bed of arugula, pouring the pan juices over the top. Ahi Tuna is really delicious and I am sure your family will also love this very steak-y fish.

You could even try it as “Poke” I guess (ceviche style). I am willing to eat it this way but my (Japanese) wife won’t let me make this as poke as she says this is not “sashimi grade tuna” (true) which costs three times as much, selling for about $25/lb instead of this at $8/lb. So at 8 bucks a pound this is a another good deal from Mr. Trader Joe. 

ahi2

ASIAN MARINADE: 2 tbs soy sauce; 1″ peeled fresh ginger, grated; fresh ground black pepper, a little honey or brown sugar, teaspoon of sesame oil (or olive oil) plus lemon or lime juice for a marinade (you can make a bit more and save some to serve on the side). Marinate in the fridge (on fully defrosted fish) for 30-60 minutes turning it once. Cook as desired.

tunainsert2
tunainsert1

Having said how great this fish is please let’s not eat TOO much as this species is on the “near threatened” list. We eat AHI tuna no more than once a month. Though this says the Atlantic Yellowfin is sustainably harvested.

TJ Fresh Mozzarella Log (w/ CAPRESE SALAD recipe)


RAVE

I think I can get this review in just in time for End of Summer when one can still find excellent tomatoes. The perfect thing to pair with juicy farm fresh tomatoes is this Trader Joe’s Fresh Mozzarella Cheese Log. Unlike the firmer low moisture “pizza” mozzarella, fresh mozzarella is a softer milky fresh cheese. Fresh mozzarella is perfect for pairing with tomatoes, basil and good virgin olive oil for a super easy and delicious classic: a “Caprese Salad” (Insalata Caprese) Caprese Salad is the simplest of Italian salads, with sliced fresh mozzarella, tomatoes and fresh basil leaves, dressed with olive oil. Like a Pizza Margherita, it features the colors of the Italian flag: green, white, red.

This mozzarella is shaped as a log and is pre-sliced into rounds which makes this super convenient and easy. Open it, and put the rounds of cheese on a plate with sliced tomatoes. You can arrange them artistically, alternating tomato and round of cheese if you want to impress but even just cutting the slices into quarters and tossing with cubed tomatoes is fine! Douse with some good extra virgin olive oil of course! Sometimes I add a few capers and a little of the caper liquid.

With some good bread you have a super easy dinner or lunch and a small slice of heaven ready in minutes especially if you can find great tomatoes. Serve this salad to guests and they will love it. And the fresh mozz is good of course just eaten as is, put on a cheese plate, or used to make a terrific sandwich.


A 1 lb package is $4.99 ($5.99) which for fresh mozzarella is as usual, a pretty good deal chez Trader Joes.

RECIPE CAPRESE SALAD (INSALATE CAPRESE): Layer alternating slices of tomatoes and mozzarella on a plate or platter. Tear up a good number of fresh basil leaves and sprinkle them all over everything. Drizzle with some good extra-virgin olive oil and season with salt and pepper to taste. (OPTIONAL: some jarred capers with some of their juice, or a very small amount of a vinegar especially Balsamico) Serve with a nice crusty bread.

(Post Summer) If you can’t get great tasting beefsteak tomatoes get the small cherry egg shaped Italian tomatoes Trader Joe’s carries. They are a little expensive but are really tasty, cut in half, and mix up with cut up mozzarella. Can you make pizza with this mozzarella ? Yes, it will give up some more liquid so a super hot oven is important.

VEGETABLE & SOBA NOODLE STIR FRY KIT (aka Yakisoba)


VEGETABLE & SOBA NOODLE STIR FRY

This “stir fry kit” is composed of cut, prepped veggies all ready to stir fry, along with a packet of (cooked) soba noodles, plus a packet of soy- ginger finishing sauce. It has broccoli, bok choy, savoy cabbage, snow peas, scallions.

Look for this in the refrigerated / veggie/salads case. I say this convenient $5 kit is in actuality, most of the makings of Japanese YAKISOBA – minus a few ingredients – that one can easily add to make that super tasty Japanese dish. So when I saw this at TJ’s in the veggies section I said to myself, “Great I’m making Yakisoba tonight”.

YAKISOBA – YAKI means grilled. SOBA means buckwheat (noodles). Ergo, grilled noodles. Yakisoba is one of Japan’s most popular homey dishes, both eaten out, made at home, and served at school. Japanese kids pretty much grow up on it. Everyone loves Yakisoba.

You can cook up this Kit exactly As-Is on the package and get a decent Veggie Noodle Stir Fry. Or easily turn this kit with a few additions, into Yakisoba.

The main thing missing would be some kind of Main or protein (Pork, Tofu, Chicken….) plus some ginger and garlic, and a little more soy.

Protein: If you are vegetarian, you might add BAKED TOFU, sliced up into strips and grilled with the veggies. Possibly also add some sliced mushrooms, either shiitake, crimini or white mushrooms, any of them will add a lot of “umami”. If you are not vegetarian, protein options could be the traditional sliced or ground pork (even very thinly sliced pork belly). In Japan Yakisoba is even sometimes made with squid! Any protein you can stir fry with the veggies will pretty much work. Chicken strips, or steak, even ground beef. When I made it, I used pork tenderloin from TJ sliced up into strips that I first got a nice sear on both sides then set aside to add back at the end when I added the sauce package. I have cut pork chops into strips to make this with. Ditto chicken breast or thighs.

TIP: The noodles come cooked in a plastic bag. When you open the bags the soba noodles are totally stuck together in a firm block that you can’t do anything with. You MUST prep them ahead a half hour before you start your dish. Loosen them up by letting them soak in very, very hot (even boiling water) for 15-20 minutes – not for  two minutes as the package says which is not enough time! Once they loosen up a bit you can gently untangle and loosen them with your fingers and drain them in a colander, ready to throw in at the end with a pinch of more oil. Want more noodles then come in this package? Then just first cook up some Soba noodles or Chinese noodles or rice noodles, drain them and have them ready to toss in the pan with some more oil.

YAKISOBA: In a non-stick pan, sauté some ginger and garlic with your Main Protein (slicked pork, chicken or tofu or SHRIMP (or seafood blend!) in a few teaspoons of neutral oil. Toss in the veggies. Add mushrooms if using. Stir fry veggies about 3 mins. till barely cooked (do not overcook them) Add the softened noodles and the meat or tofu back to the pan. Stir fry for a few more minutes, then turn off heat and add the sauce to coat. A few drizzles of sesame oil would be great. Add some Green Dragon Hot Sauce if that’s your style. Stir all to combine. I threw some arugula and more chopped green onions on top. Katsuobushi* flakes if you have them? Done. About 10 minutes and you have a delicious dish.

PS – If you can find “Katsuobushi” flakes* at an Asian store, that would be great to top this with for authentic Japanese Yakisoba. Amazon sells Katsuobushi.  Ditto for “BENISHOGA” (Picked Red Ginger). Both are traditional Yakisoba toppings. But even if you don’t put these on, it’s still pretty good.

UPDATE: The first time I purchased this kit there were 2 packs of Soba Noodles inside. Recently on 2 occasions when I purchased it, there is only 1 pack of noodles in the kit. Whats up with that? With 2 packs there was really a meal here for at least 2 people but with 1 pack of noodles, obviously that’s less noodle to veggies ratio.

sobastirfry3

Previous Older Entries Next Newer Entries