TJ’s ORGANIC VIRGIN COCONUT OIL


So I’ve been hearing about Coconut Oil, once considered highly unhealthy, being re-evaluated from a health standpoint.

Coconut Oil has been getting a fair amount of buzz this past year. I had read an interesting piece in the NY Times by Melissa Clark about cooking with it.

I saw this jar of Trader Joe’s Organic Virgin Coconut Oil in the NEW PRODUCTS shelf at my Trader Joe’s. I thought, I should see what all this fuss is about and made a mental note to pick up a bottle and try it. Now Coconut Oil is a really interesting product in that it has uses both ‘Culinary’ and ‘Health & Beauty’ ! So you can put this into many categories. So I jokingly say, you can eat it and you can put it all over your skin. Or use it as Cooking Oil but also use it as a Hair Dressing. It really is good for all these things, in fact, it has so many uses!

English: Coconut oil in solid state.
Coconut oil in solid state. (Photo credit: Wikipedia)

When I opened the bottle and sniffed it, it was just an intense smell of well, coconut. I mean you smell it and your mind instantly thinks ‘Tropical Beach’. At least mine did. Its just got a lovely aroma.

I heard it was great in cooking especially good for sautéing vegetables, as Melissa Clark wrote about. So I peeled and sliced up some Carrots (TJ Organic Carrots) and tossed them in a pan with about a tablespoon of the Coconut Oil. Again, an amazing smell wafted through the kitchen. Tossed in the sliced carrots and let them sauté for about 10 minutes or so. After the carrots were slightly browned I tasted one. It had a wonderful under-note of (yes) Coconut. The sauteed carrots tasted delicious, and I could imagine many vegetables benefitting from being cooked in coconut oil. Melissa Clark mentions roasted sweet potatoes – that sounds great – and she has a number of interesting recipes listed in her piece, which you can try.

Coconut Oil when it’s kept at a cool temperature appears white and in a solid state. If it warms up it, will become clear and liquid.

Additionally of course this is good for other things, like putting on your hair too. And it is wonderful to rub on dry skin as a moisurizer. I even read its a natural antiperspirant (you put a drop or two under your arms).

What a useful product. The question may be Where to keep the jar?! In the Bathroom or the Kitchen?!!

A jar costs $5.99 for 16 ounces. Check it out. I’m just beginning to experiment with using it. I put it on my hair, it helps keep my curly hair, curly and moisturized – it does make your hair soft and smell wonderful too.

UPDATE: (Spring 2019) They lowered the price. It’s now $4.99 !

Traditional bullock-powered coconut oil mill. ...
Traditional bullock-powered coconut oil mill. Dried coconuts are crushed and oil is squeezed out. (Photo credit: Wikipedia)


Related articles

Trader Joe’s FIG BUTTER


RAVE

So I read about this product in a “Fearless Flyer” and then I saw it the next day on the shelf and thought I should buy it and report on it. When I got home I confess I instantly opened it up, and dug a spoon into the jar to taste it. First reaction, was OMG, this is some fantastically good stuff!

Trader Joe’s FIG BUTTER is an extremely tasty figgy jam. Well actually this is a true fruit butter, meaning fruit that has been cooked down till its super concentrated. And no, there’s no “butter” in it all all, its a kind of old-fashioned reference, when canning fruit was common.

TJ Fig Butter contains just five pure all natural ingredients: figs, water, sugar, lemon juice, and pectin.

The taste is like very yummy, very ripe figs, but deeper and more complex than eating a fresh fig. After reading the Fig Butter post in the Fearless Flyer, I learned there are three different kinds of figs used to make it and surely this is one of the reasons the flavor profile is so complex.

CONTAINS : MISSION FIGS, CALIMYRNA FIGS, CONADRIA FIGS

For breakfast I made a piece of TJ Tuscan Pane toast with some TJ crunchy Peanut Butter and put this FIG BUTTER on it. What a heavenly combination! Try it!

In fact the main problem with this fig butter is its too good, I bought it yesterday and between my wife and myself, the jar seems to be half gone already. Next, I will have to sample the other fruit butters TJ sells. Mango, Pumpkin, Lemon, etc… An 11 oz jar of TJ’s fruit butters costs $2.29

CLASSY TIP: Next time you have company over and do a cheese plate, put a small dish of this Fig Butter out with the cheeses (like Brie, Unexpected Cheddar and some hard cheeses.  Your guests will rave over the way this goes with the cheese. A few drops of fresh lemon juice mixed in with the jam and it will be even better.

…Working with Maine-based culinary craftsmen, focused on old-fashioned, farmstand goodness and flavor, we created Trader Joe’s Fig Butter. It starts with a medley of fresh, ripe figs: Mission figs for their extreme sweetness, Calimyrna figs for their distinctive nutty flavor and Conadria figs for their nutty-sweet balance. The whole figs are dried, ground and then crushed before being slow-cooked, in small batches, with sugar, lemon and pectin. It’s a simple recipe using only the finest, freshest ingredients, and no preservatives or artificial colors. The result is full fig flavor concentrated in a smooth, spreadable butter.

In some markets a great deal of butter is reta...

In some markets a great deal of butter is retailed from tubs. (Photo credit: Wikipedia)

FROM TJ FEARLESS FLYER – BAGEL WITH CREAM CHEESE AND FIG  BUTTER

Overhead view of toasted bagel with cream cheese, topped with fig butter, diced apricot, crushed walnuts, and honey

Fig Butter Cream Cheese Bagel

Trader Joe’s Fig Butter is a favorite ingredient among recipe testers and tasters alike in our test kitchen, and it’s easy to see why: it shines in sweet and savory applications, packs a punch of flavor in a compact jar, and it’s just downright delicious. Elevate the standard bagel & cream cheese with a healthy dollop of said Fig Butter, followed by chopped walnuts, dried apricots and a generous drizzle of honey. 

DIRECTIONS

Remove lid from fig butter. Microwave on half power for 30-second intervals, stirring in between, until warm. Set aside. Toast bagels per your preference. Top each half with cream cheese, spreading to cover bagel. Drizzle with warm fig butter. Top with diced apricot and walnuts, followed by a generous drizzle of honey. Enjoy immediately.

Trader Joe’s Kimchi Fried Rice


TJ’s Kimchi Fried Rice

Disclaimer: I only tried this at the Sample Station. In fact I confess the Sample Station is the locus where I usually gravitate to almost immediately after I enter Trader Joe’s. I check out if they have something interesting to taste that day, and of course to grab myself a little cup of free coffee. Don’t you? Truly the Coffee Station is one of the best things about Trader Joe’s, isn’t it? Every supermarket should copy them; going shopping would be much more fun.


Kimchi Fried Rice is a fairly new item and TJ’s seemed to be promoting it quite a bit. Recently it was the product “on sample” 2 or 3 times that I had been to TJ’s of late. What I found funny was they had a sign next to the samples: Its said something like, “Warning: Spicy! Try at your own risk! If you can’t take spicy food, be careful!” Then I tasted it and my first thought was “Huh? This is spicy?”. Seriously to me it was about as spicy as baby food (I can take the heat). I started discussing this disconnect of the “WARNING” sign with the TJ employee who was in charge of the Sample Station at the time. He was of the same opinion – the Kimchi Fried Rice is not spicy at all! He cracked me up when he told me however how many people actually complained “Jeez this is so spicy” after they tasted the Kimchi Fried Rice on sample. So many that they put up the “warning, spicy” sign!

So here is what I thought after tasting the Kimchi Fried Rice. My wife is Korean-Japanese. So I knows me some Kimchi Fried Rice (the authentic Korean kind). I adore it. I can even cook a decent version myself. So if I compare that taste to this stuff, I just have to say this is a pretty bland, insipid version. The two times I tried it was soft and fairly mushy, plus it had barely any kimchi taste; To me, its flavor profile was just weak, which I attribute to an industrial production of such a “homey” dish. For one, truly Kimchi Fried Rice needs real garlic flavor, as well as Kimchi. This barely even had any garlic nor Kimchi flavor for me. The real thing is a fantastic dish, and this? Frankly to my tastes perhaps it would be suitable for babies (ok maybe Korean babies). Now having said that – Trader Joe’s does have a decent “ethnic” fried rice. TJ’s JAPANESE FRIED RICE is actually pretty good. In my years,  I’ve eaten tons of both Kimchi fried rice and Japanese fried rice and know what these should taste like, and I can cook decent versions of both.

So, sorry Trader Joe’s but in my opinion your KIMCHI FRIED RICE is a big miss!

If you try it, also try the JAPANESE FRIED RICE next time and see which you prefer. Pretty much same as TJ’s another new “Korean” addition, Trader Joe’s Kimchi, which I found such a poor product I actually “returned” it! Perhaps those who don’t live in a city where you can buy real kimchi sold at a Korean market, might think “so this is kimchi, tasty”.  Actually if you had real Kimchi you would know this stuff is not even close to being as tasty as a real Korean-made kimchi – for example this brand (Tobagi) of Napa cabbage kimchi I get at H-MART supermarket on 32nd Street (Manhattan’s Korea Town). If you A/B taste tested this prepared kimchi vs. the Trader Joe’s version? It would be almost a joke, its just no comparison! Anyone who’s been to a Korean restaurant will know the real taste of kimchi. At $1.99 (10 oz) you can try TJ’s version and see for yourself. Let me know what you think.

RANT

Kimchi bokkeumbap, kimchi fried rice in Korean...

Kimchi bokkeumbap, kimchi fried rice in Korean cuisine (Photo credit: Wikipedia)

Uncrystallized CANDIED GINGER – Its Baa-aack!!


STOP THE PRESSES!


This is a package of Trader Joe’s ‘Uncrystallized CANDIED GINGER’.

Its back!

Yes, its true. This now almost mythical TJ product is finally back in stock after being MIA and off the shelf at Trader Joe’s for more than one year! 

Possibly due to some labeling issue (I heard some manager mention sulfites), possible due to supply issues, this was off the shelves at Trader Joe’s for a long long time. I mean over a year!  Seems they’ve solved whatever the issue was because its back on the shelf. And the label on the back has only two things on it, ginger and sugar. Pretty natural product.

So I can finally get my fix for this (very) spicy adult candy. (Now should I buy a case?)

O frabjous day! Callooh! Callay!

Thanks to one of my readers, Nancy who first sent the alert about this!

World’s Best Raisin Bran Cereal!


My morning brainstorm in the shower thinking about what to eat for breakfast. In a Euraka Moment, thinks I, “Why not “make” my own raisin bran? No, not with just regular TJ’s raisins but with the Golden Raisins I just bought yesterday.” The Golden Raisins. Plus TJ’s Bran Flakes (which is bar none best bran flakes made)?

YES – you heard that right

“Golden Raisin Bran”

And I did it. And it was…. MIGHTY, MIGHTY FINE!

Try it for yourself! Why has no one though of this before? Am I a genius or what?

Recipe: Put some Bran Flakes in bowl. Add a small handful of the Golden Raisins.

Milk. A little sugar. Yogurt topping? Nice.

Done.

Eat up.

OMG, right?

You must, must must try these two TJ’s items together

Then tell me if the combination is not the best damn cereal you’ve ever had.

Easy Home-Made Pizza using TJ’s Pizza Dough (Re-Visited!)


I noticed that the all-useful TRADER JOE’S PIZZA DOUGH which had been only 99 cents (!) for as long as I can remember, went up to bit by bit and is now $1.29. While I loved it for under a buck, its still not a bad deal, say compared to Whole Foods prices.

The pizza recipe” post I did before seems to be one of the more popular posts here, so I’m re-visiting the topic of PIZZA (Yeah, baby!) Pictured below is yet another pizza I made for dinner using TJ’s ever useful bag of Pizza Dough sold in the refrigerator section.

To make this I used some homemade spaghetti sauce, with some extra veggies I had leftover from another dinner (eggplant, peppers, and onions). Mozzarella, and some hot Italian sausage. At the end I put on some cooked Kale with garlic I had made another night too. See, part of the “pizza night” ethos is to use up whatever one can find in the fridge, that might work on it!


Seriously, doesn’t this home-made pizza look so damn yummy and delicious that you wish you could eat it right now?! Well guess what, you canMake your own pizza at home, folks. No really, it’s pretty easy. Do you need to use home-made sauce? Of course not, a jar or canned sauce like TJ’s Marinara would be fine. Making your own pizza is easy, fun, super delicious and is of course cheaper than buying one. There is nothing like eating a pizza you made yourself and just pulled fresh out of your oven, bubbly and browned. If you have never made pizza at home before, you must try making one yourself at least once. I promise once you do, you’ll want to make a pizza once a week. Every time I go to Trader Joe’s I buy a package of dough to keep in my freezer to always have it on hand for these occasions. It will defrost on the counter in about 3-4 hours (or leave to defrost in the fridge overnight).

Is a Recipe needed to inspire you? OK then heres how to make a pizza:

pizza5HOMEMADE PIZZA WITH TJ PIZZA DOUGH

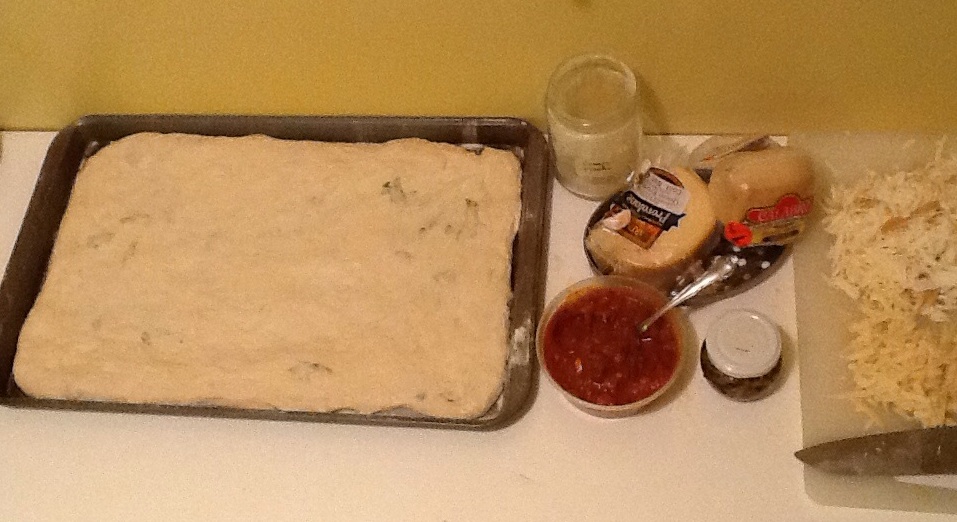
Ingredients needed: 1 package of TJ’s Pizza Dough, about 8 ozs of some sauce (Marinara, etc),  about 1/2 lb cheese (Mozzerella, Parmesan, Pecorino, Grana Padano, Jack, etc ) and using more than one cheese is even better (optional: fresh garlic, diced tomato, fresh/dried basil, onion, parsley, cooked mushrooms, zucchini, broccoli, kale, etc) and of course Italian Spices (oregano, basil, rosemary, red pepper, black pepper….)

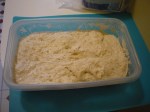
1) Take your (defrosted) package of TRADER JOE”S PIZZA DOUGH out of the fridge –  leave it out at room temperature for at least one hour (the package says ’20 minutes’ but it is too short). Room temperature dough will be easier to work and press out,so plan ahead! (around the 1/2 hour point, turn on to pre-heat your oven to 450-500…very hot) Do not nuke it.

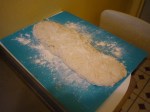
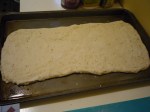
2) Prepare a clean work surface thats large enough to work your dough on. Dust it with flour. Remove the dough from the package (TIP: Its sticky! I invert the plastic bag to remove and just keep tugging and pulling till I get it all out). Dust the dough with flour so you can work it. Now you shape it. With your hands well floured and adding a little extra flour (or cornmeal) on the surface of the dough as needed, start to press out the dough using your fingers. Keep working and turning it until it is your desired size and shape. I generally use a square non-stick “half-sheet pan” to cook my pizza in. Its a little trickier to make the dough into a square/rectangle instead of a round but I like it like this. If using this kind of sheet pan, put a little olive oil in the pan on the bottom, put in your dough, put some oil your fingers and on top of the dough and work it into shape using your fingers, pressing it out gently. The oil will help you to stretch it out and work the dough towards the corners. Let the dough rest five minutes if you find its not ‘listening’ and keeps pulling back on you. Normal dough behavior. Just let it rest 5-10 minutes, then come back. Try to be careful and not to make the pizza “too thin” (or rip it!) if you can. And not too thick either or it will be tough! Get it just right. Build up the outside edge a bit. You can gently brush the edges with some olive oil if you want (optional). Another Option: Use a rolling pin to get it started and transfer that carefully to the pan and then work it. Remember if its the pan style its a rectangle you are shooting for. Shaping the dough is the only tricky part of making a pizza. The more you do this, the more you will get the hang of handling dough. If its not perfectly shaped your first time don’ worry. It will still taste as good! Don’t give up. Check YouTube for some videos on making pizza, study a bit, practice and keep doing it. You will get the hang of it and find it much easier in future. If you want to go the traditional round pizza route, of course try that. Moving the raw pizza into the oven is a tricky part, though personally I have found a square one in a sheet pan works.

IMG_0003
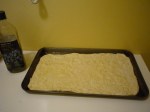
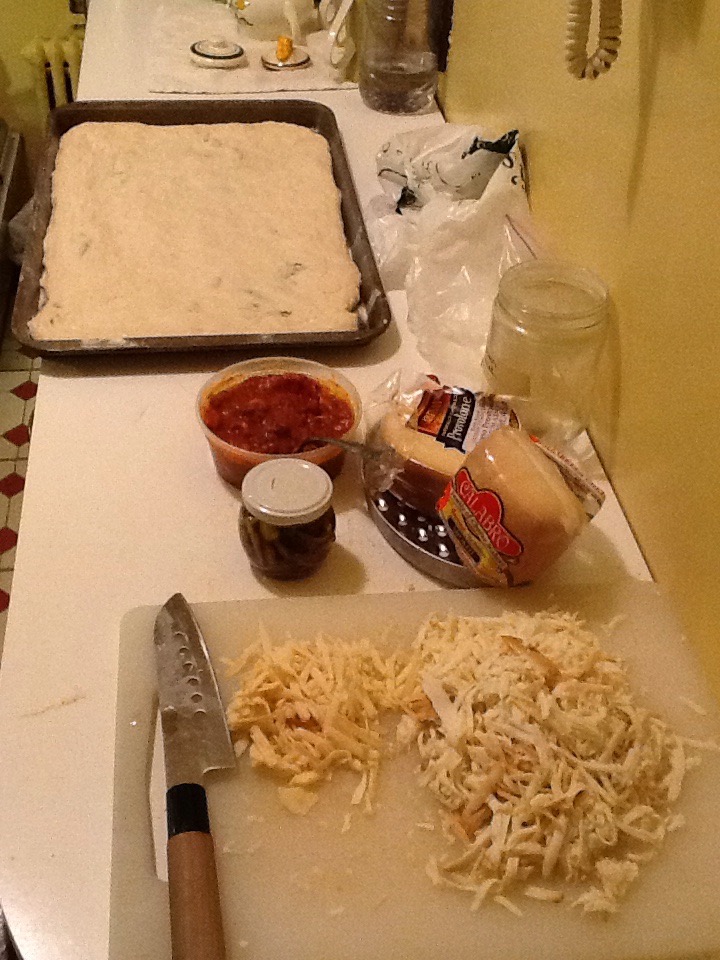
READY TO ASSEMBLE (I am using smoked mozz and a little provolone) 
Now that you have your pizza dough base ready, its time for the ingredients
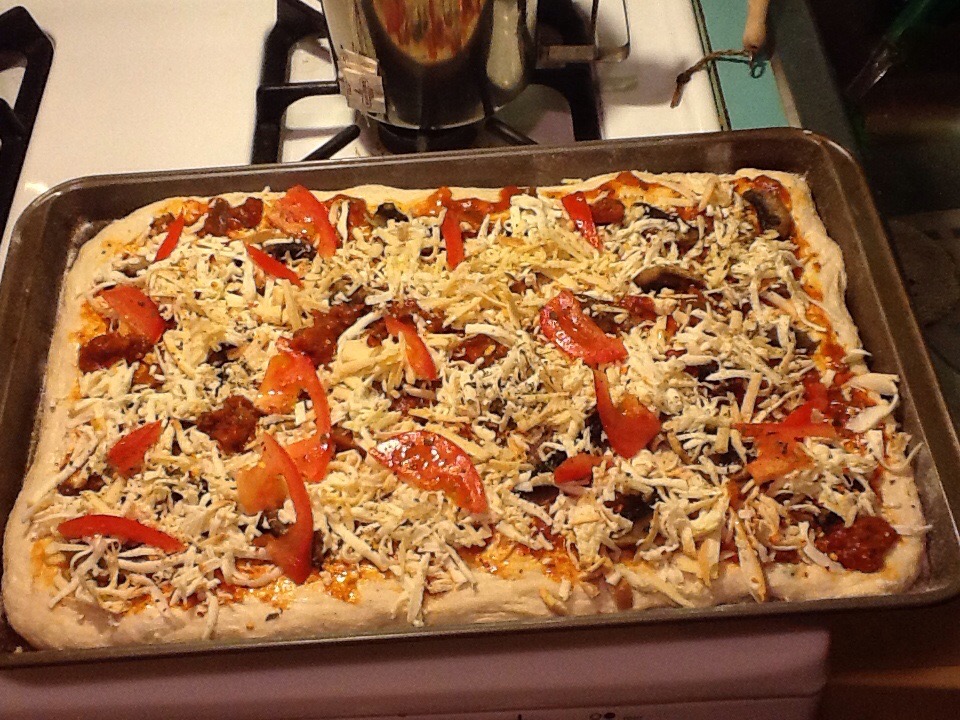
3) Spread your tomato sauce out with a large spoon. Do not oversauce – that will make the pizza harder to cook evenly and soggy. Add sauce as a thin layer. Now add your other ingredients, again in moderation, and spaced out. Don’t place too much stuff on it. Sprinkle on grated mozzerella or other cheese as desired. I like to use more than one cheese (Parmesan is great as well as Grana Padano) If using sausage, pre-cook a bit just till you can slice easily (I cooked mine covered for 5-6 minutes, let it cool in the pan, then sliced it up and added it) Add extra spices as desired (Oregano, Rosemary, Basil, Red Pepper flakes….). Add fresh cracked pepper. Drizzle a bit of Olive Oil all over just before baking (Are you vegetarian? Vegan? Adjust the ingredients as needed. I’m sure you know how. Soy cheese perhaps?)

4) BAKING: When its ready to bake, place the pizza in pre-heated 450-500 degree oven. Very hot! Real pizza ovens are much hotter than your home oven can go but we can work with just longer baking. TIP: I have started to put the pan on the oven floor for 7-10 mins then move it to the middle or top rack for the rest of the baking time. This really bakes the bottom (if you don’t have a pizza steel or stone). If moving it sounds too complicated, just use the middle rack.

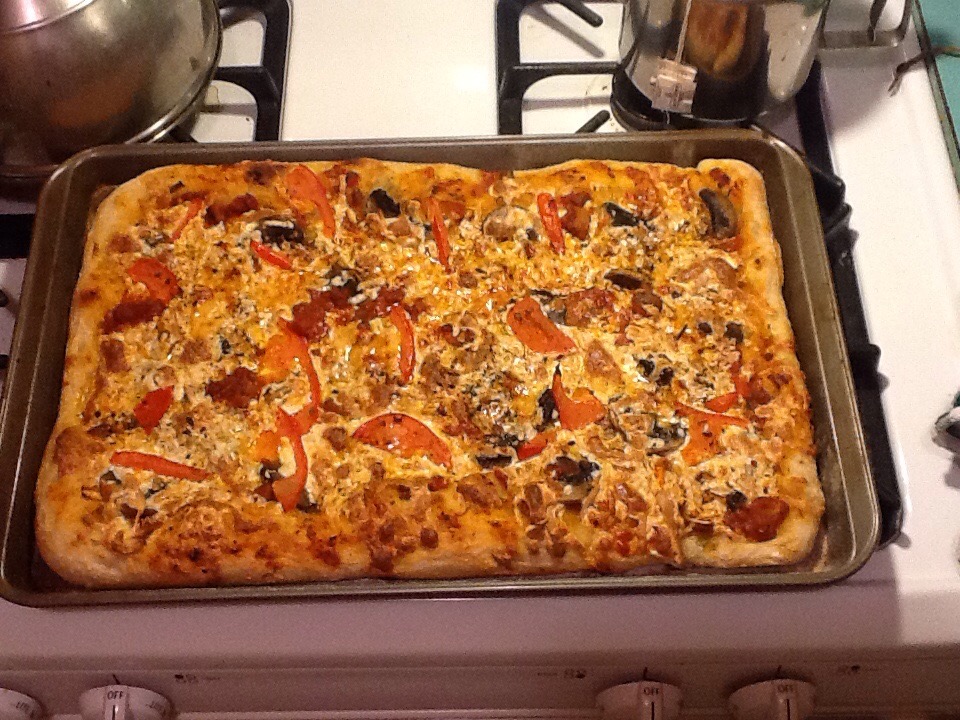
Check pizza after 15-18 minutes (ROTATE the pan after 10 minutes, to even the baking. The pizza will probably need a total of around 20-25 minutes to bake, but your mileage may vary, as every oven is different. Check it frequently until you think its done. When it is done, I think you will know; it should be bubbly and slightly browned on top (as well as the bottom) However be careful not to over-cook your pizza or it may be a bit tough. Real pizza ovens are 600-900 degrees or hotter, so a pizza bakes in mere minutes….we just do our best with our regular home ovens. When your beautiful pizza looks – and smells – like its done, it probably is, so remove it from the oven. Check it. If its finished, you should let it rest 2 minutes before cutting as it will be easier to slice. Yes, waiting is the hardest part. SLICE it up with your favorite tool. I’ve got a pizza cutter from a 99 cents store, and it works fine. Believe it or not I even use kitchen shears to cut up pizza, and that works fairly well. If you have fresh Basil, now is the time to add it – use kitchen shears as I learned to do watching master pizza maker Dom DeMarco at the legendary DiFara’s Pizza in Brooklyn)! Dom’s pizza’s are to die for.

IMG_0002Before and After. The hardest part in the above may be waiting 20 minutes for the pizza to come out of the oven.

IMG_0004

The thing is, once you get the hang of making a pizza yourself a few times you will find its really not that hard to make, nor takes that much time. You must try making pizza yourself.

Please leave some feedback on your successes (or failures)

UPDATE / TIP: I have been experimenting with “aging” the TJ dough in the fridge and let it sit for a few days before use. It will ferment slowly and will get sourdough-y taste this way as the dough ferments. Try this aging for 1 (or 2 days) past the “sell by” date. Experiment with the aging of the dough tip and see if the crust and flavor is improved. I find it so.

Personally I have found the regular dough is the best version TJ has  – I have found the whole wheat version too tough, and the herbed version too off-tasting and bitter. Your mileage may vary. If you really want great pizza, eventually you may even make your own dough!

Buona Fortuna (good luck!) and Enjoy…

Gently remove dough from bag and place on lightly floured work surface. Let dough rest for 20 minutes, then, for best results, stretch by hand or roll out with rolling pin to 12-inch diameter. Top with your favorite toppings and bake in a preheated 450 degrees oven or BBQ grill for 8-10 minutes, or until cheese begins to boil and the bottom of crust is golden brown.Use a hot pizza stone or lightly oiled pan for optimum results. Mangia!

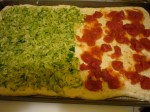
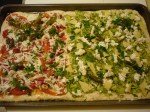
AND YET MORE PHOTOS OF MAKING OF A PIZZA USING HOMEMADE DOUGH

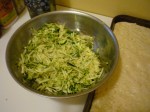
HALF ZUCCHINI / HALF TOMATO

TJ’s 2011 Most Favored Favorite Products


Its official! Here’s the list from the horse’s mouth…

TJ’s 2011  List of Favorite Products

1. Frozen Mandarin Orange Chicken (I’m always told this is the #1 seller)
2. Triple Ginger Snap Cookies
3. Greek Yogurt
4. Hummus (Chipotle, Jalapeno Cilantro, Mediterranean)
5. Candy Cane Joe Joe’s Cookies*
6. Frozen Chocolate Croissants
7. Dark Chocolate Peanut Butter Cups
8. Valencia Peanut Butter with Roasted Flaxseeds
9. Frozen Mac ‘n Cheese
10. Charles Shaw Wines
11. Dark Chocolate Almonds
12. Speculoos Cookie Butter**
13. Roasted Seaweed Snack
14. Olive Oil Popcorn

15. Raisin Rosemary Crisps
16. Dark Chocolate Almonds with Sea Salt &
Turbinado Sugar
17. Soy Chorizo
18. Frozen French Onion Soup
19. Meyer Lemon Cookie Thins
20. Frozen Fire Roasted Bell Peppers and Onions
21. Frozen Turkey Meatballs
22. Chocolate Covered Potato Chips
23. Bananas
24. Steamed Lentils
25. Frozen Palak Paneer
26. Frozen Chicken Potstickers
27. Lemon & Triple Ginger Snap Ice Cream
28. Frozen Pear Tarte

* (seasonal)

Thoughts? Comments?

My first favorite is #7 (Dark Chocolate Peanut Butter Cups) Better than Reese’s. For me, these are like crack!

TJ’s Fresh Cranberries (and RECIPE)


Every year this post becomes the most popular post around Thanksgiving, ENJOY~

FRESH VS. CANNED CRANBERRY SAUCE

To me the greatest sin one can make for Thanksgiving is not making the cranberry sauce from scratch and just opening up a can.

There is simply no comparison to MAKING YOUR OWN CRANBERRY SAUCE fresh, and no reason not to. It’s literally the EASIEST thing in the world to make. If you do it this year, I promise you everyone will say how wonderful the cranberry sauce is. Seriously it could not be easier to make. Recipe follows….

If you’ve never made your own cranberry sauce and are used to opening a can of that jiggly jelly stuff (ugh!) you owe it to your family to make it this year. The “work” involved may take you about 1 minute, plus maybe 15 minutes just letting it do its own thing cooking. TIP: Make it at least an hour ahead of eating so it can be served at room temp (hint, even better do it one or two days before to get it out of the way). It will set up beautifully in the fridge. Take it out of the fridge an hour or so before eating.

EASY “RECIPE” :  Open bag. Dump berries in a pot. Add one cup water* and one cup of sugar. Bring to a boil. Basically that’s it. When it boils, just lower the heat down to a simmer and let it alone until the cranberries “pop” in about 15 to 20 minutes. When the berries have popped, they’re done so just turn off the fire. DONE! Let it cool for 30 minutes or so. As it cools it will thicken up (cranberry skin contains a great deal of pectin, a natural thickener).

If this easy recipe seems “too easy” for you and you want to get a tiny bit fancier and more creative, here are things you try…  * Instead of water, you can use orange juice. A bit fancier? Grate in a little orange zest. Even more creative? This year I added a tiny bit of cayenne pepper and a pinch of fennel seeds and some lime juice. Ginger can be nice in a cranberry sauce.

Once you try this you will be shocked at how easy it is to make and how infinitely better this fresh sauce is over the canned stuff. At the time of this writing a 12 oz. bag cost $1.99, a decent price. (UPDATE: 2018, a bag was $3.49 at TJ’s) Update 2: 2022, a bag was back down to now $2.29. UPDATE 2023: Organic ones are $3 a bag so buy those!

You can even buy an extra bag of berries and throw it as is in the freezer where it can keep for a few months if you want it outside of just Thanksgiving.  It goes great with grilled chicken breasts.

Once you make your own, you will realize how easy it was to make and and like me, will never buy the sauce in a can again, or even TJ’s pre-made stuff.

 Now go, and sin no more…

#DIY #CranberrySauce

RECIPE VARIATION: Indian Cranberry Chutney. In a saute pan, melt a tablespoon butter, and add some chopped garlic, a quarter chopped onion and saute stirring for 3 minutes. Add a teaspoon of TJ’s curry powder (or more to taste) and cook one minute. Add the zest of one orange and its juice with 1/4 cup of water and 1/4-1/2 cup of brown sugar or Palm Sugar (or more or less to taste). Add the package of cranberries and simmer 25-30 minutes stirring frequently. If you want heat add a few dashes of Cayenne or your favorite Hot Sauce (PeriPeri, Green Dragon.…) to taste.

TJ’s Refried Black Beans “With Jalapeños”


“High in Fiber and a Good Source of Iron”

Says so right on the front label and all true. This is a very healthy thing for you to eat. And since a can costs just 99 cents, it’s very economical too. Now if you are not familiar with “Refried Beans” there are a few things you should know. One is in Spanish “frijoles refritos” is slightly misleading in that while it literally can be interpreted as “re-fried beans” they are not “fried” twice, they are “cooked twice”, first the beans are boiled, then they are mashed/fried with some kind of fat. Authentic Mexican FRIJOLES REFRITO are either pinto, black, or other beans that have been cooked till very tender, and then mashed till they are a smooth paste. The mixture is cooked with onions and garlic and spices in some oil or fat (traditionally manteca (lard) is used but more ‘modern, healthy’ versions may use olive oil). Manteca does give the beans the best flavor though!  Cooked until a thick paste, Refritos generally is eaten with corn tortillas in one form or another, or simply put on the plate as a side. Of course the famous combination of Corn and Beans eaten together create a complex protein that is equal to meat protein, and are eaten in many places all over the world to sustain a population. In Mexico this is very true. This classic combination is both a high quality protein at a relatively low cost compared to meat/chicken/etc, and is a staple eaten daily by MILLIONS of people around the world.

However Trader Joe’s Refried Black Beans are a much simplified version of this classic bean dish. The ingredients list says simply : Black beans, water, sea salt, spice, jalapeños. So actually since there is no fat of any kind listed, in truth these are not really “refritos” at all! You could eat them this way just out of the can, but I find them just so-so that way, I think of them as a time-saver over making my own beans (soaking overnight, etc) and mashing them. Tasting these you may say as I did, “what where’s the jalapeño’s?” Are there really Jalapeño peppers are in this?? They seem non-existant taste wise so I assume the amount is miniscule.

When you open up up the can, be aware this beans don’t look too appetizing till prepared (frankly one could say it looks like dog food) but it will look fine after you heat them up and hopefully gussy them up as I suggest .

Anyway think of this can as a starting point to something. If you invest a mere 5 minutes to improve these* to make them tastier and more authentic, you will be rewarded with something twice as good as the way they taste right out of the can, I promise you. Here’s what I suggest you do with these mashed black beans – Smash or chop up a fat clove of garlic and toss it in a non-stick pan, over medium heat with a nice slug of good Olive Oil (I used TJ’s Spanish EVOO). Add the bean paste from the can (carefully! it may spit in the hot oil)  Perhaps add some diced fresh or pickled jalapeños or other chile peppers ‘to taste’. A great thing to add would be one small can of TJ’s Roasted Green Chiles, chopped up. A little diced onion sauteed for 5 minutes in the oil before the beans go in couldn’t hurt and will add much flavor to your Frijoles Refritos. Now add some spices: oregano, cumin if you like it, a dash of red pepper flakes plus a good sprinkling of black pepper. Taste for salt. Cook the the beans, pushing down with a wooden spoon, mixing into the oil and every now and then stirring and making sure they don’t burn as they cook. Use a low flame. Cook the mixture for about 5-10 minutes until the paste softens up, moves freely (If too thick, add a tiny pinch of water) until the Frijoles look smooth and smell wonderful. If you like spicy, a few splashes of your favorite hot sauce would go well added now. There….much improved over just opening this can.

Are you so Lazy that reading the above makes you say all that sounds like way too much work? Wow you are a lazy bum! OK then if you do nothing else, at a minimum when you heat the beans up just add some olive oil and lots of black pepper and some hot sauce to the pan.

Eat your Frijoles Refritos with tortillas, tostadas…. Use as fillings in burritos. Add salsa, cheese, tomato, greens. Refritos are also great served as a side with a sprinkle of cheese, maybe some mexican style rice, and possibly some Trader Joe’s Soy Chorizo.

If you’ve never had these before, try them, or their cousin Trader Joe’s Pinto Refried Beans with Salsa.  Those are also quite good. They are very tasty when jazzed up a little, so filling, healthy and economical it’s not even funny. Your heart and cholesterol will thank you, especially since you made them with olive oil and not lard (thought authentic manteca does taste best, sorry!)  For a dollar you can easily always keep a few cans of these in the pantry.

RAVE.

VEGAN FRIENDLY


Homemade Pizza (Recipe) with TJ dough


Here’s a Pizza I made for dinner last night. For the base, I used Trader Joe’s Pizza Dough, in the refrigerated section. The bag of fresh dough sells for the super price of just 99 cents (for 1 lb). Thats correct, 99 cents folks. Whole Foods has pizza dough too- however  they sell it (frozen) for almost double or triple TJ’s price.

Trader Joe’s has three varieties of Pizza Dough – Regular dough, Herb and Whole Wheat. I amost always buy the “regular” (ie, “white”) dough. Why? Well I have tried the herb dough but found it a bit bitter and off tasting. You would be better off adding your own fresh garlic and fresh or dried herbs.  As far as the Whole Wheat dough, while noble in thought as “healthier pizza” in reality I found it came out with a too tough crust compared to the regular dough. You can try them all over time and see what you think.

I find a package of dough makes a very nice sized pizza for two people with leftovers (maybe). The 1 lb bag of dough could easily feed three. It might feed four with some side dish and/or a big salad. As pizza dough is after all “bread dough” of course one can use this to make a loaf of bread or some breadsticks (see below). This is a good idea too. So this is one of those TJ items I ALMOST NEVER LEAVE THE STORE WITHOUT. If you Freeze it, you have this handy stuff on hand whenever you want. It can defrost overnight or in a pinch  you can leave it out in the morning to defrost by  dinner time.

HOME-MADE PIZZA

Ingredients:
This time, believe it or not I did not use tomato sauce though I usually do. Today I was a bit unorthodox and did use some fresh tomatoes. Plus a ton of other vegetables: zucchini, mushrooms + peppers (I cooked both before with oil and garlic), more fresh garlic, olive oil, Mozzarela, Parmesan, Italian seasoning, hot pepper flakes, more fresh tiny red peppers I had on hand, plus anchovy paste… oh yeah and a simple homemade pork sausage with peppers and garlic (which I browned up first) and crumbled on top. It was “almost” a vegetarian pizza, and you could easily make it that way. Maybe use some TJ Soy Chorizo, perhaps for the sausage component…Or not.

(READY FOR BAKING)

Method:  Its will take a little practice but this is do-able. Take the Pizza Dough out of the fridge for at least a 1/2 hour to 1 hr beforehand! It needs to not be super cold to work it. Turn the dough out of the bag on to some flour. Flour your work surface and gently stretch out your dough to your pan. I used a non-stick half sheet pan. Put some olive oil in the pan first and spread it with your fingers. Put some more on top of the dough. I stretched the dough to fit the whole pan and used my fingers to build up the edges. Then add your sauce and toppings and cheese.

I dabbed some anchovy paste all around the body of the pizza, and gently smushed it in with my fingers with a good dollop of Olive Oil (TJ’s Spanish EVO). I cut my zucchini into paper thin slices and laid them out all over in neat rows, laid tomatoes sliced thin all over, added my cooked mushrooms and peppers I made the night before, laid out the Mozz (shredded) all over, hit it with red pepper, sliced garlic, Italian seasoning, a little arugula, and more olive oil which I brushed on the edges with my fingers. Some more tomato on top which got “roasted”, some more fresh red peppers, a pinch of salt, plus lots of black pepper.

Baked it at 450 degrees for 20-30 minutes (The TJ dough package says bake 9 minutes, thats sounds crazy short unless you have a very very hot pizza oven) In the style of my idol, Dom DeMarco (of Brooklyn’s DiFara’s Pizza) I tossed on some grated cheese (Parmesan or Grana Padano as Dom uses) AFTER it comes out of the oven. This gives your pizza some extra zing for sure.

OUT OF THE OVEN

Also like Master DeMarco, I was liberal with the Olive Oil especially on the pan for this squarish rendition, as I wanted that crust to get really crispy and brown -which it did thanks to that oil. After it was ready, I hit it with more fresh arugula on top (was tempted to use lemon juice like Paulie Gee too but didn’t…next time. Lemon juice on pizza? Trust me, with the arugula, its fantastic. Paulie Gee has some real pizza chops).

Result: Due to all the veggies honestly I felt the center was too thin and came out too wet  with all too many veggies I had loaded it with. If I did it over, next time I would not stretch out the dough quite as much and leave it much thicker all over to hold up to the veggies. The zucchini and fresh tomato produce a lot of moisture. In the center it was too moist. However other than the center the pizza came out perfectly. The outside edge crust (aka cornicone) was really crunchy and good, especially for something made in a regular home oven. Would it be better with a pizza stone? Maybe, I just don’t have one, nor do I have a Pizza Peel so would be a bit hard to get in the oven, without using the sheet pan I felt. I’m a very adaptable cook. Taste-wise? EXCELLENT. I got a high five from my Mrs, who deemed it one of the best pizzas I’ve made. First time I used the anchovy paste, which added a wonderful undernote of flavor. And the homemade sausage was fantastic on top. So basically I made the “sauce” right on the pizza in the oven. It does look tasty, no? I hope this picture inspires you to make a pizza at home; Its easy and delicious.

Oh and I tested out making a few breadsticks with a bit of the extra TJ’s dough. They were good! Try doing some of those too with this dough. You could of course even make a fresh baked bread with it too. I am now buying at least 2 packages of TJ’s Pizza Dough, and throwing one in the freezer to have on hand at all times. I do make my own dough on occasion but it requires some thinking ahead.

Now I know this isn’t exactly a “recipe” but to me, Pizza is a basic idea, that is improvised depending on your mood, ingredients, etc. So for the most basic “recipe” buy this dough, stretch it out on to a half sheet pan, add some homemade or good jarred marinara or tomato sauce, some mozzarella, olive oil, fresh garlic, etc. (add preferred toppings here). Bake it in a HOT oven. Check it at 15-20 minutes and make sure its brown and bubbly. Cook for another 5-10 minutes if not. When done, take it out and toss on some (fresh I hope) grated Parmesan or other hard Italian cheese. Remove from pan to a surface you can cut on and slice it up. Once you do this, you may never go back to “ordering in pizza”.

TRADER JOE’S PIZZA DOUGH =

RAVE

Previous Older Entries Next Newer Entries